Automatic Scheduler
Create automated tasks to print labels at regular intervals, when events occur or manually. Each task defines the data source, filters, layout, printer and trigger.
Dashboards

The header shows the title Automatic Scheduler, the engine status (e.g. Engine not started) and the + New task button to create a new task.
Task table
The central table lists all configured tasks with the following columns:
- Task name — Unique name identifying the task
- Trigger — Activation type (Manual, Periodic check, Monitor folder)
- Next Execution — Date/time of the next scheduled execution
- Last Execution — Date/time of the last completed execution
- Baseline — Starting time reference
- Queue — Number of prints in the queue
- Status — Current task status (enabled, disabled, running)
Action buttons
At the bottom, buttons to manage the selected task:
- Run Now — Immediately executes the selected task
- Edit — Modifies the task configuration
- Reinitialize — Resets the task to its initial state (clears the execution history)
- Enable/Disable — Enables or disables the task
- View Log — Shows the log of past executions
- Release Queue — Flushes the task's print queue
- View Queue — Displays the prints currently in the queue
- Delete — Permanently deletes the task
Creating a new task
Click + New task to open the 5-step wizard. Each step is accessible from the top bar.
Step 1 — General
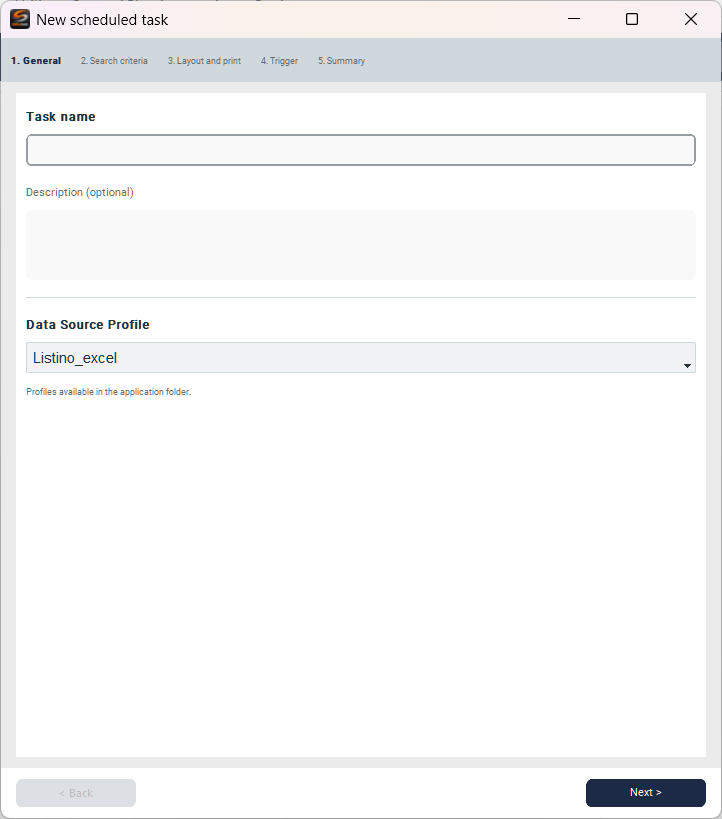
- Task name — Unique name identifying the task (required)
- Description — Descriptive notes (optional)
- Data Source Profile — Data profile to use (profiles available in the application folder)
Step 2 — Search criteria

Defines which records from the data profile to include in printing:
- No filter — Downloads and prints all records from the profile
- Filter with specific criteria — Applies custom filters
- Modified records only (incremental) — Prints only records modified since the last execution
- + Add criterion — Adds a filter criterion (field, operator, value)
- Template variables — Enables dynamic variables in values:
{{TODAY}},{{NOW}},{{LAST_RUN_DATE}}
Use {{LAST_RUN_DATE}} with incremental mode to print only records modified since the last execution. Ideal for daily updates without duplicates.
Step 3 — Layout and print

- Label layout — Label template to use for printing
- Printer — Destination printer
Print Options:
- Copies per item — Number of copies for each record
- Starting Position — Starting position on the label sheet
- Disable double-sided (duplex) — Disables double-sided printing
Print Queue:
- Print immediately — Sends directly to the printer on each execution
- Queue — Accumulates prints in a queue, to be released manually with Release Queue
Step 4 — Trigger

Defines when the task should be executed:
- Manual — Runs only when Run Now is clicked from the dashboard
- Periodic check — Checks and executes at configurable regular intervals
- Monitor folder — Triggers when new or modified files are detected in a specified folder
Step 5 — Summary
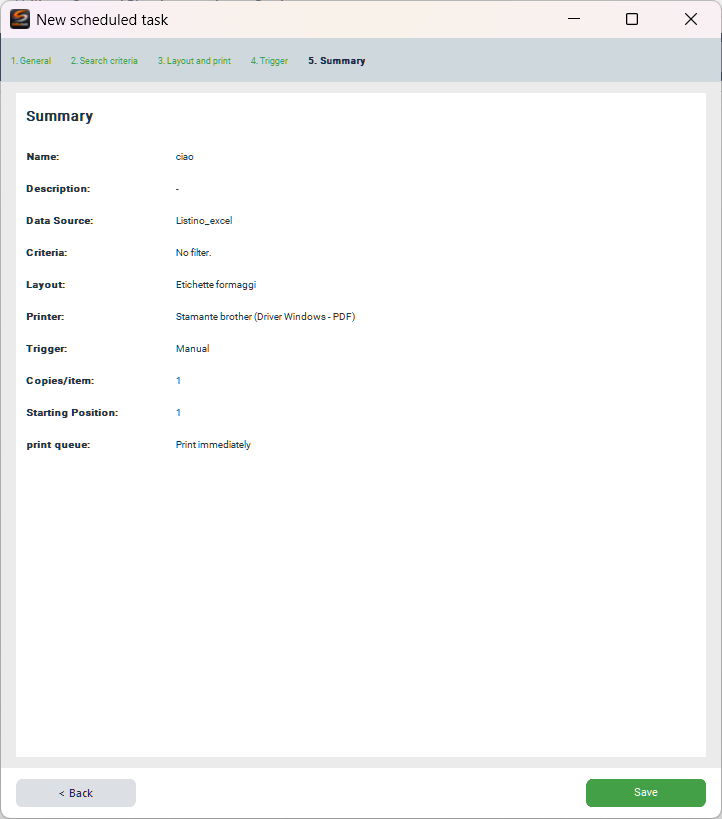
Summary of all settings configured in the previous steps:
- Name, Description, Data Source, Criteria, Layout, Printer, Trigger, Copies/item, Starting Position, Print queue
Click Save to create the task. The task will appear in the dashboard and can be started, edited or deleted.
Additional information
Scheduler engine
The scheduler engine must be running to execute tasks with Periodic check or Monitor folder triggers. Manual tasks work even without the engine running, via the Run Now button.
If the scheduler engine is not running, tasks with periodic or folder monitoring triggers will not execute. Check the engine status in the dashboard before relying on automatic printing.
Print queue management
When a task uses Queue mode, prints are accumulated without being sent to the printer. Use View Queue to inspect the queued prints and Release Queue to send them all to the printer.